Microsoft Dynamics 365 Business Central
This guide explains how to set up Service-to-Service Authentication (OAuth2) in Business Central Online.
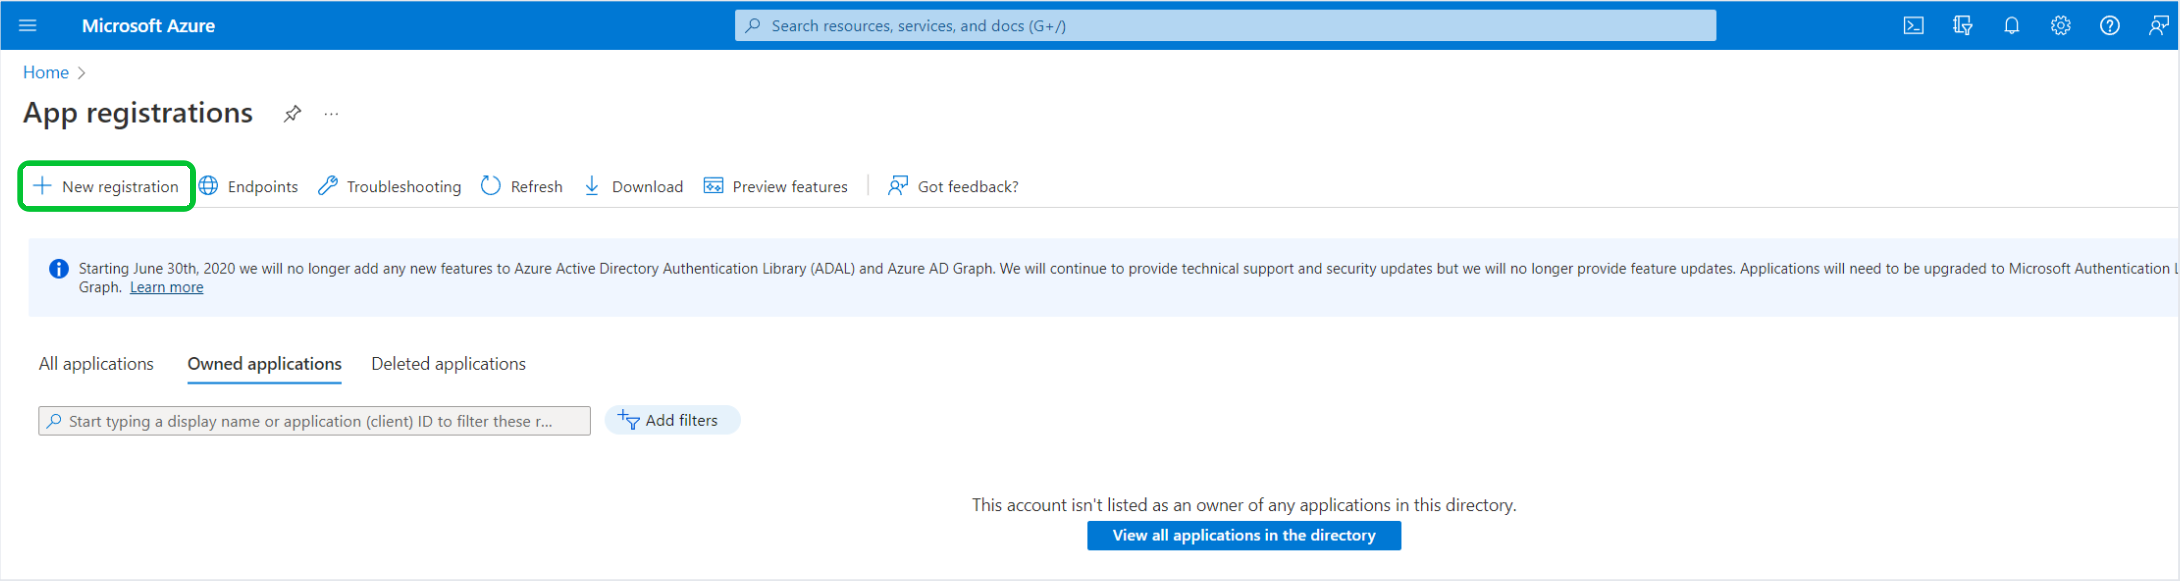
Step 1: Register an Application in Azure Active Directory
- Go to App registrations in Azure Active Directory.
- Click New registration.
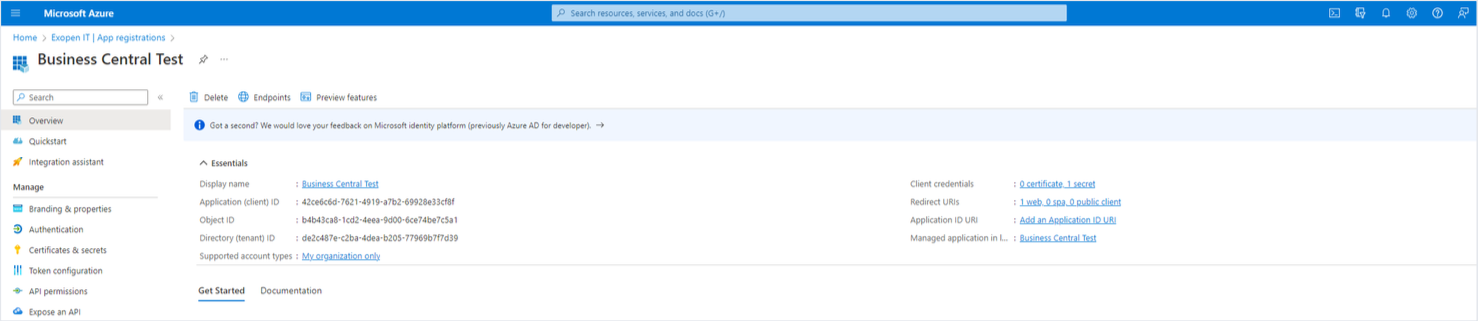
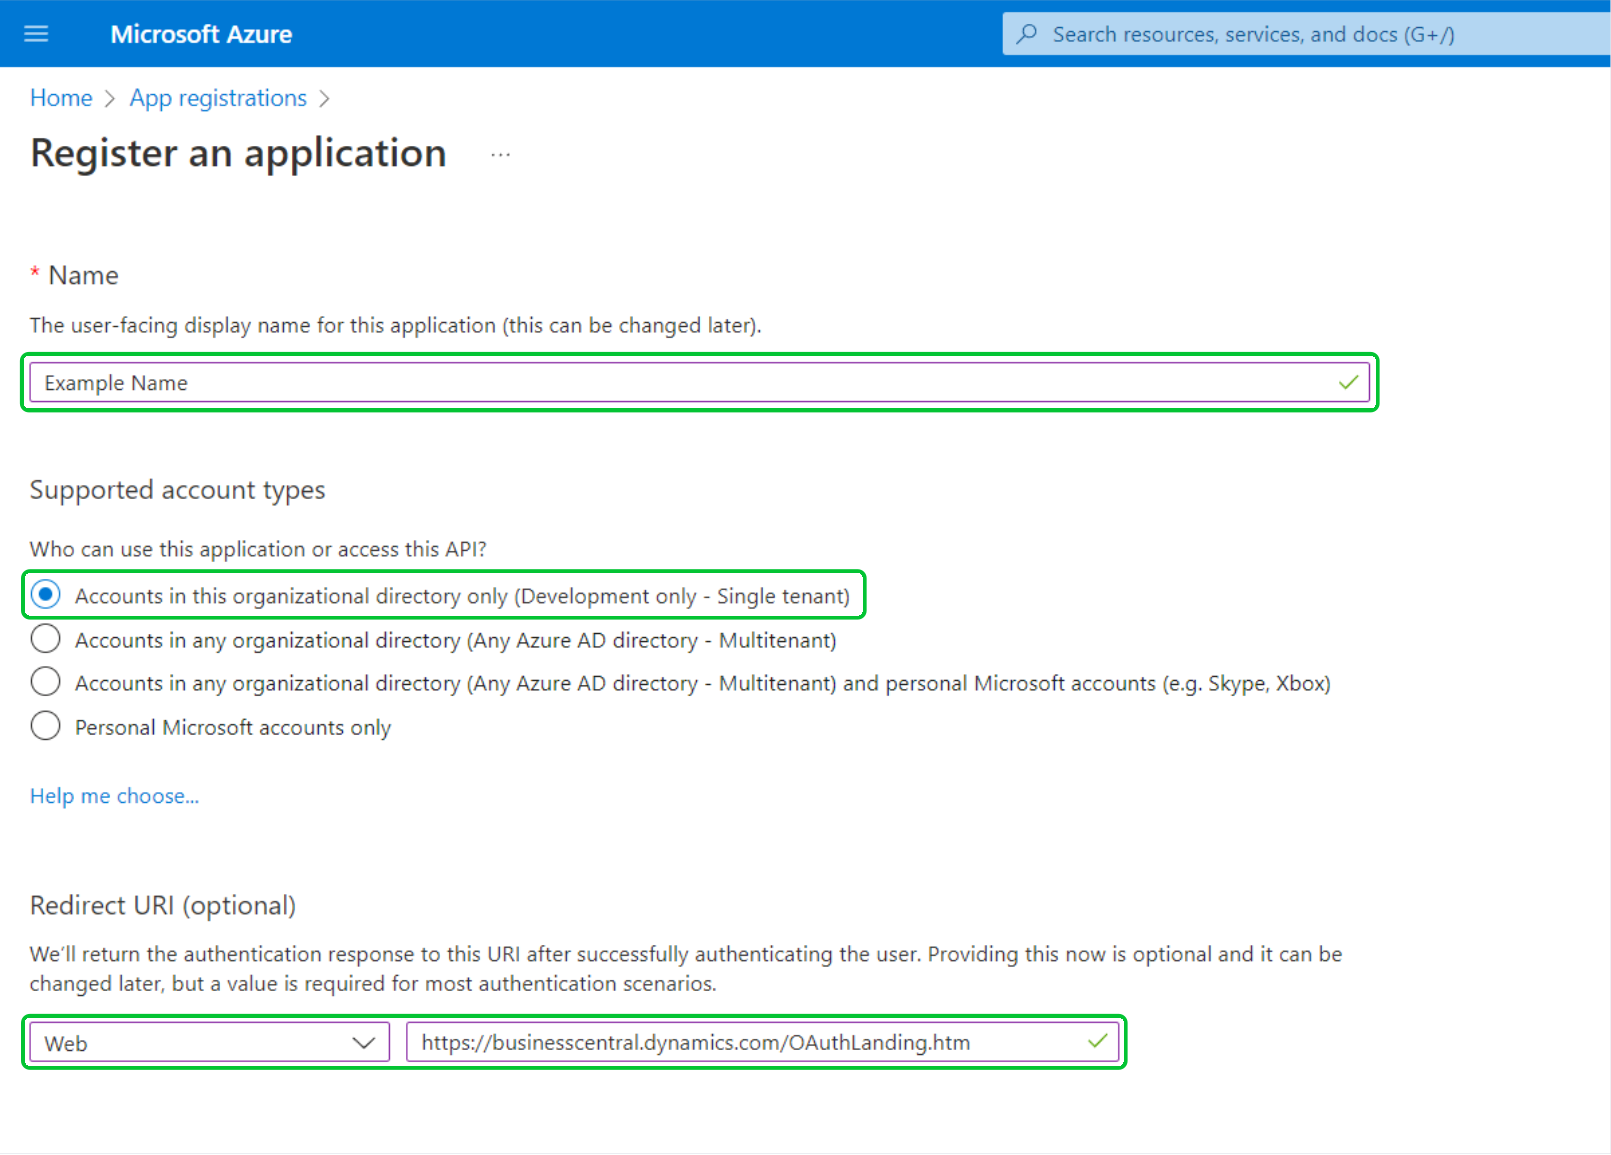
Step 2: Configure the App Registration
- Enter a name for your app.
- Choose Accounts in this organizational directory only (Development only - Single tenant) as the account type (unless instructed otherwise).
- Set the redirect URI to:
https://businesscentral.dynamics.com/OAuthLanding.htm - Click Register.
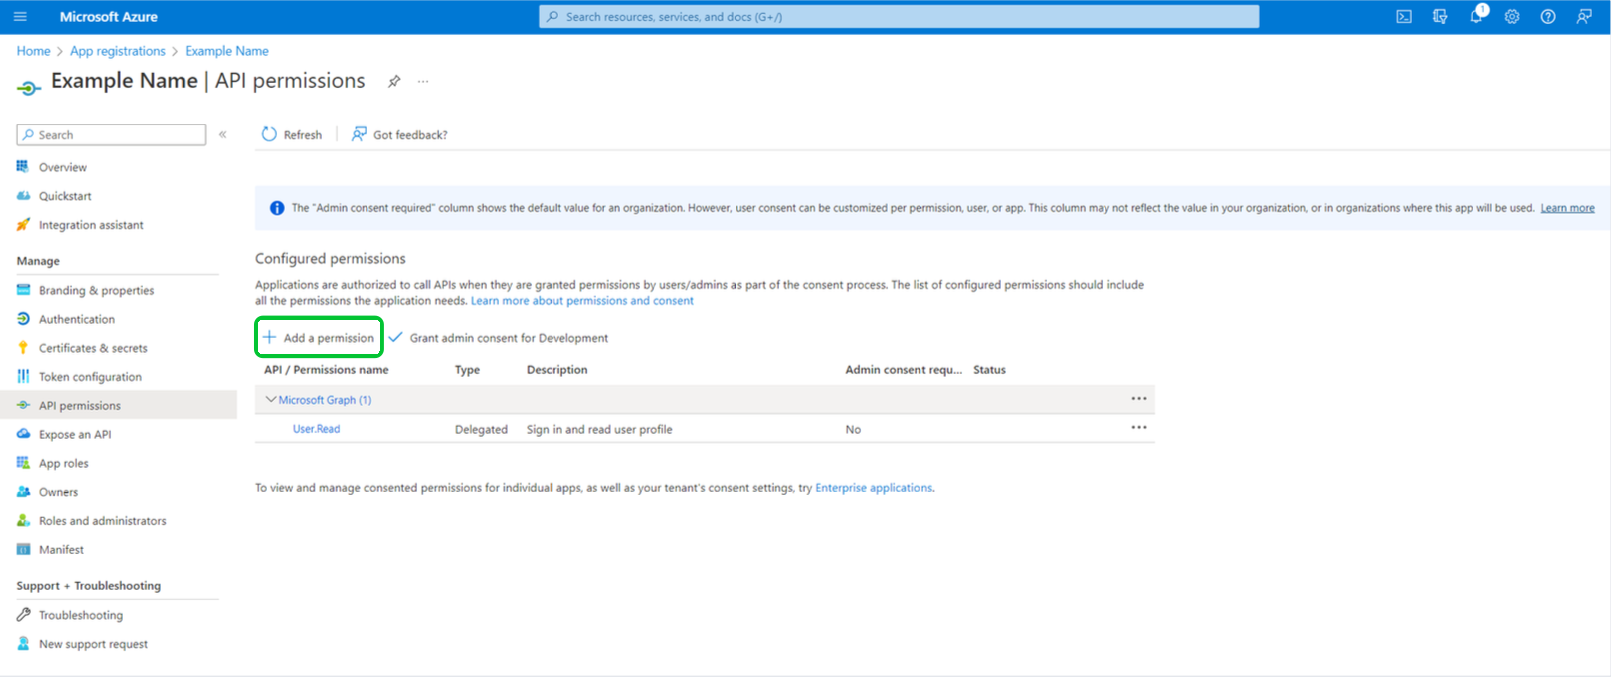
Step 3: Grant API Permissions
-
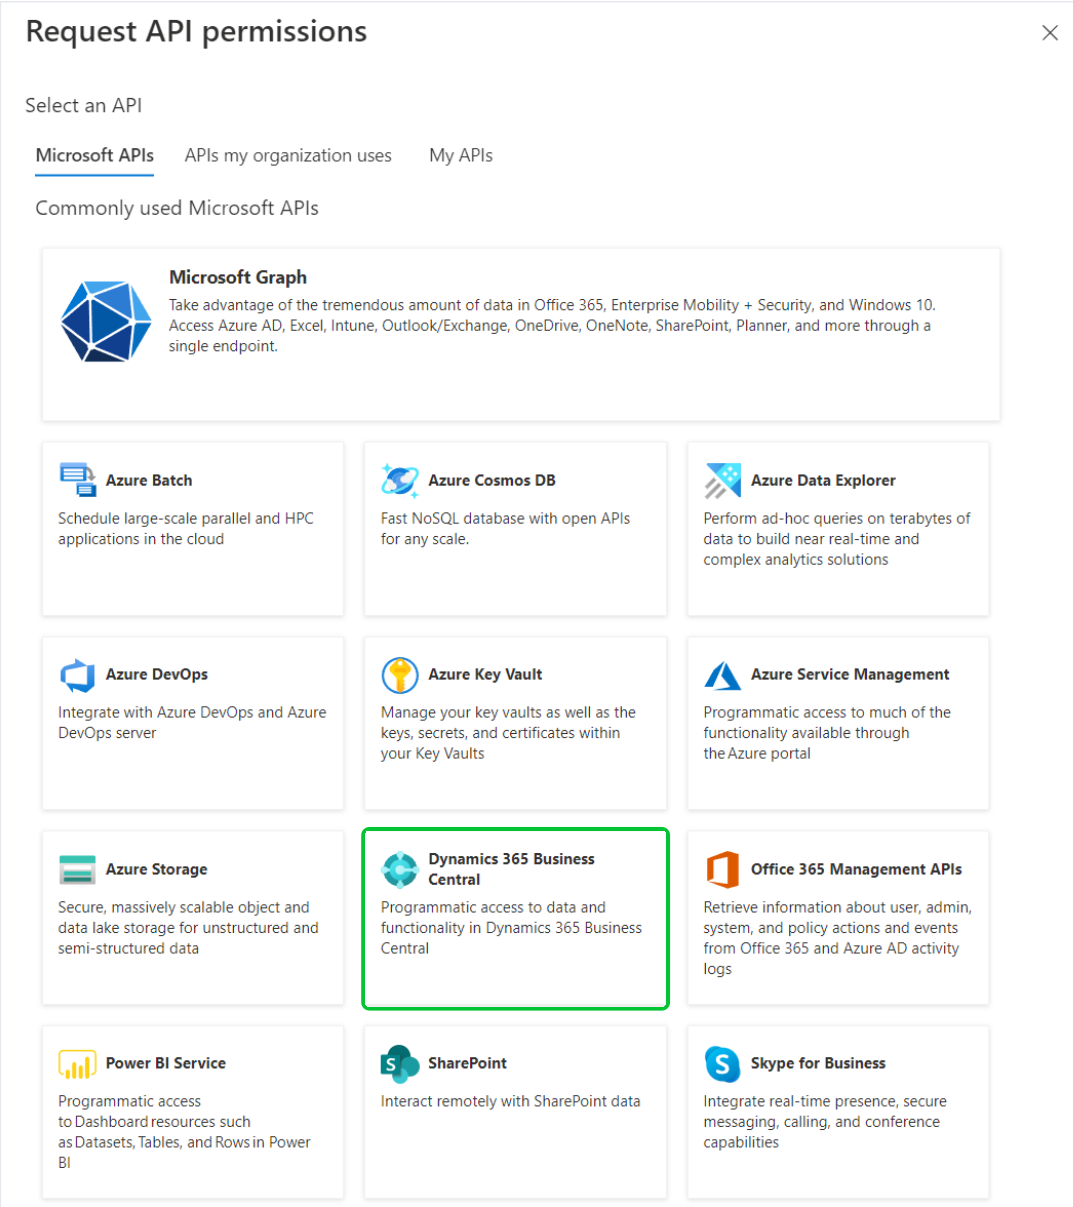
Navigate to API permissions and click Add a permission.
-
Select Microsoft APIs, then choose Dynamics 365 Business Central.
-
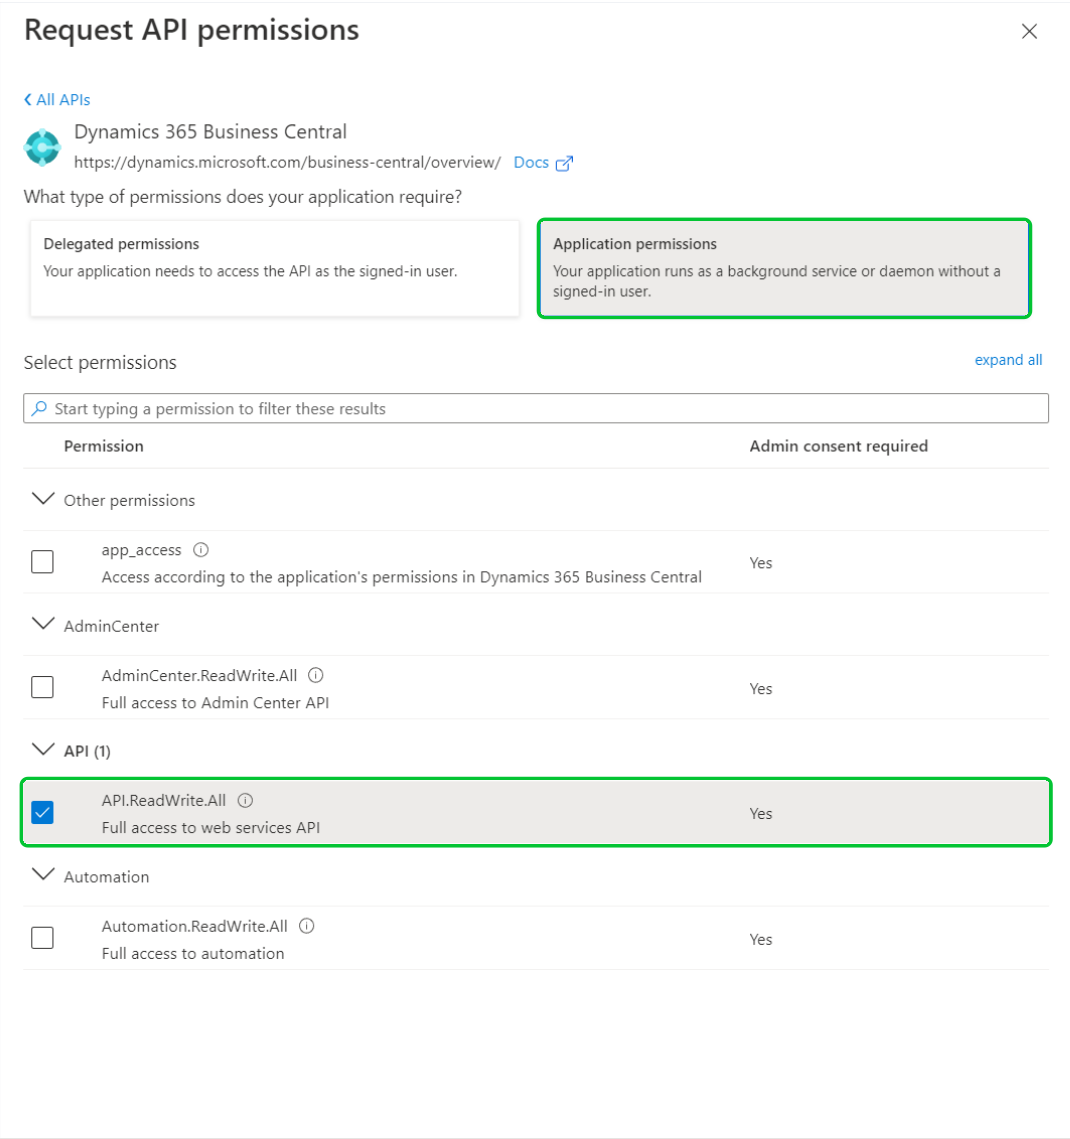
Choose Application permissions.
-
Check the permission
API.ReadWrite.All. -
Click Add permissions.
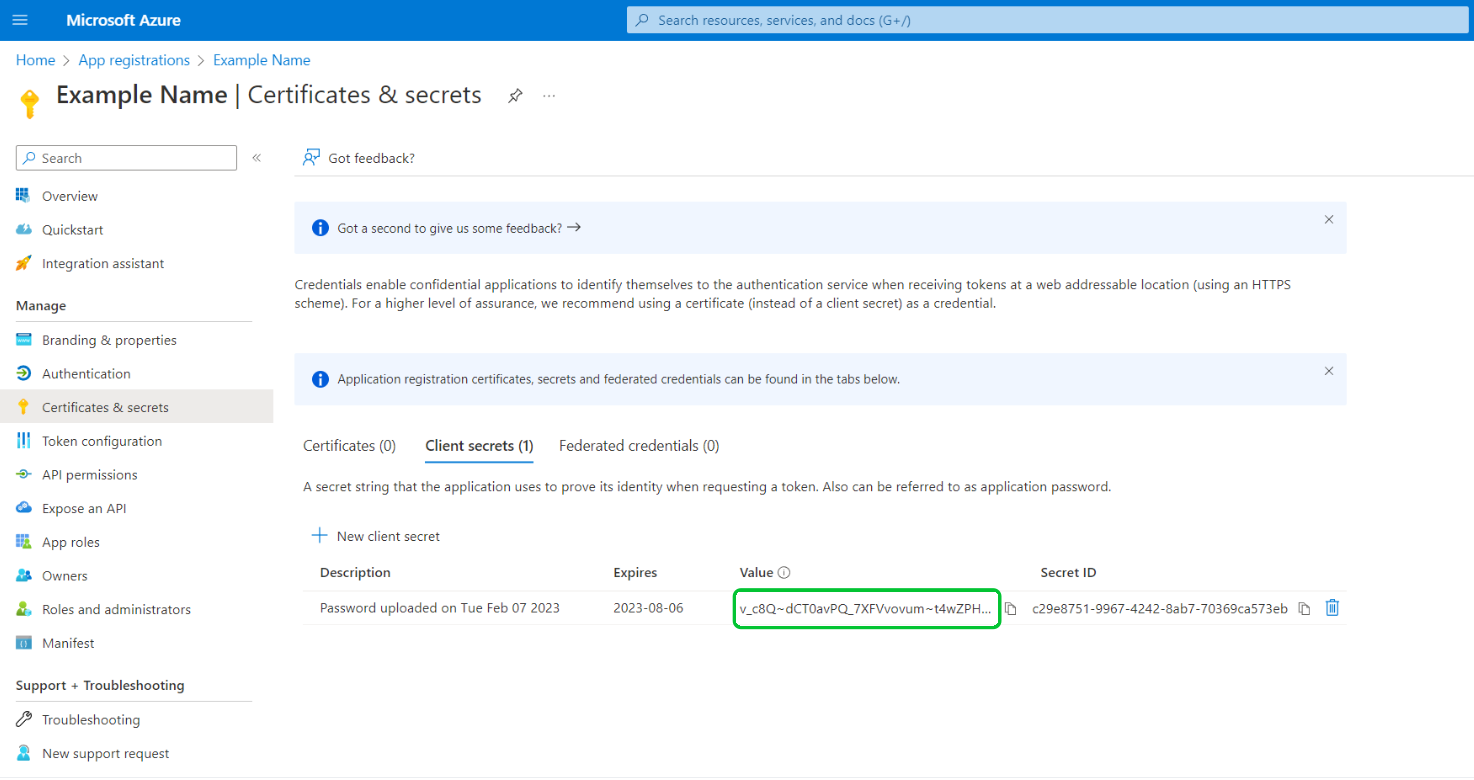
Step 4: Generate a Client Secret
-
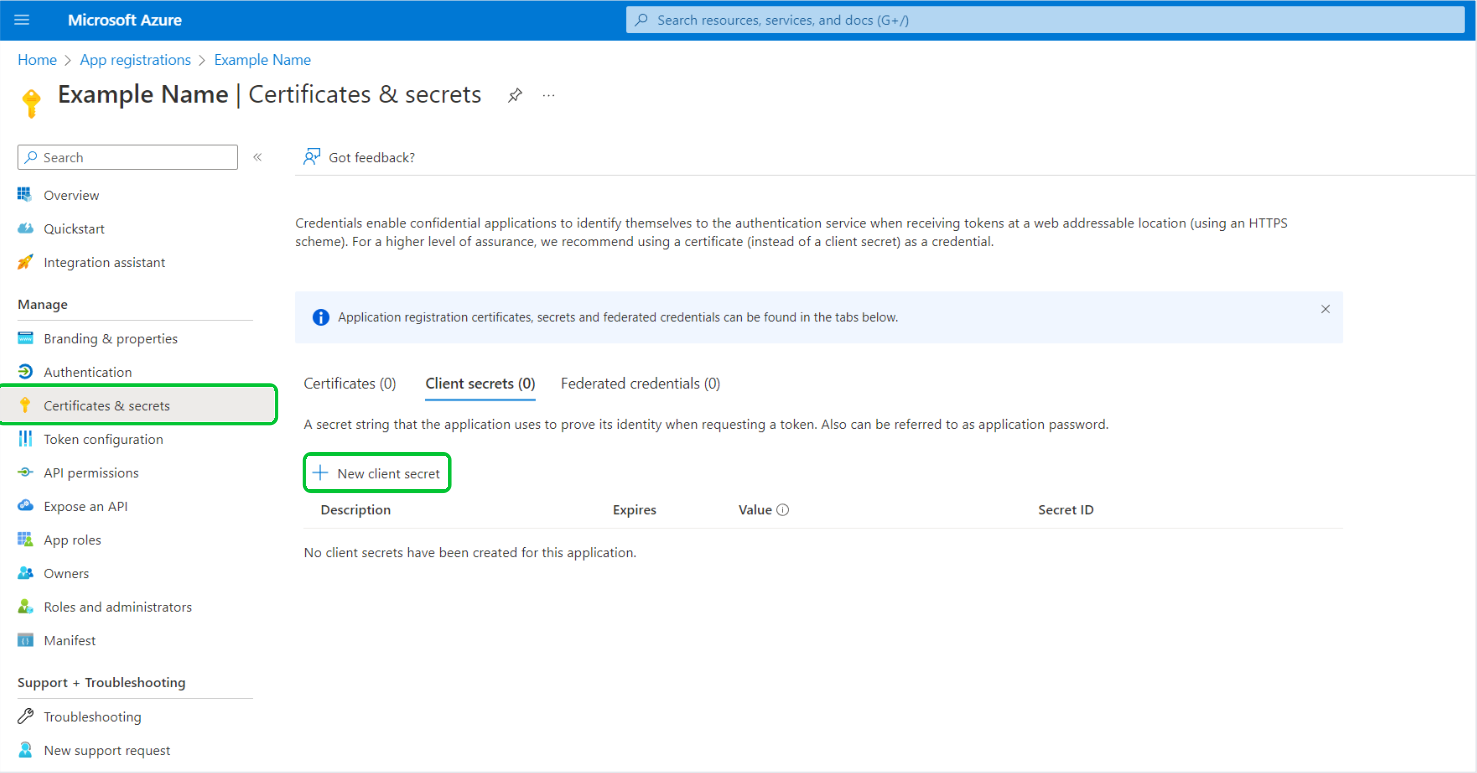
Go to Certificates & secrets.
-
Click New client secret.
-
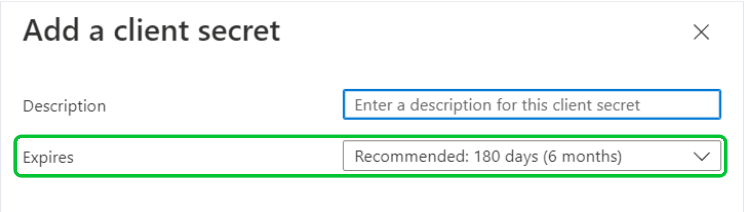
Choose an expiry period (12 months recommended).
-
Copy the Value of the client secret and store it in a secure location.
⚠️ This is the only time you will be able to view the secret value.
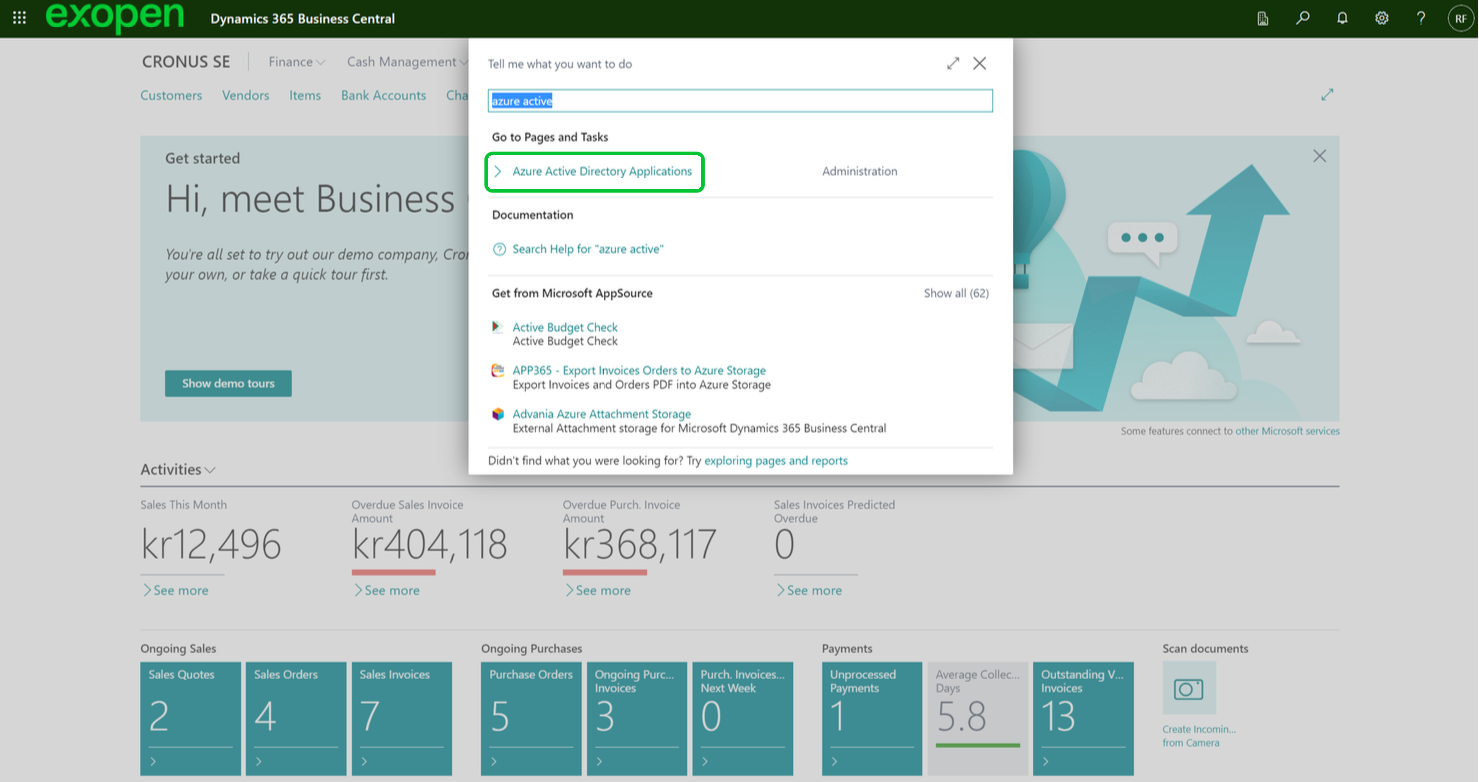
Step 5: Configure the Application in Business Central
-
In Business Central, search for Azure Active Directory Applications.
-
Click New to create a new entry.

-
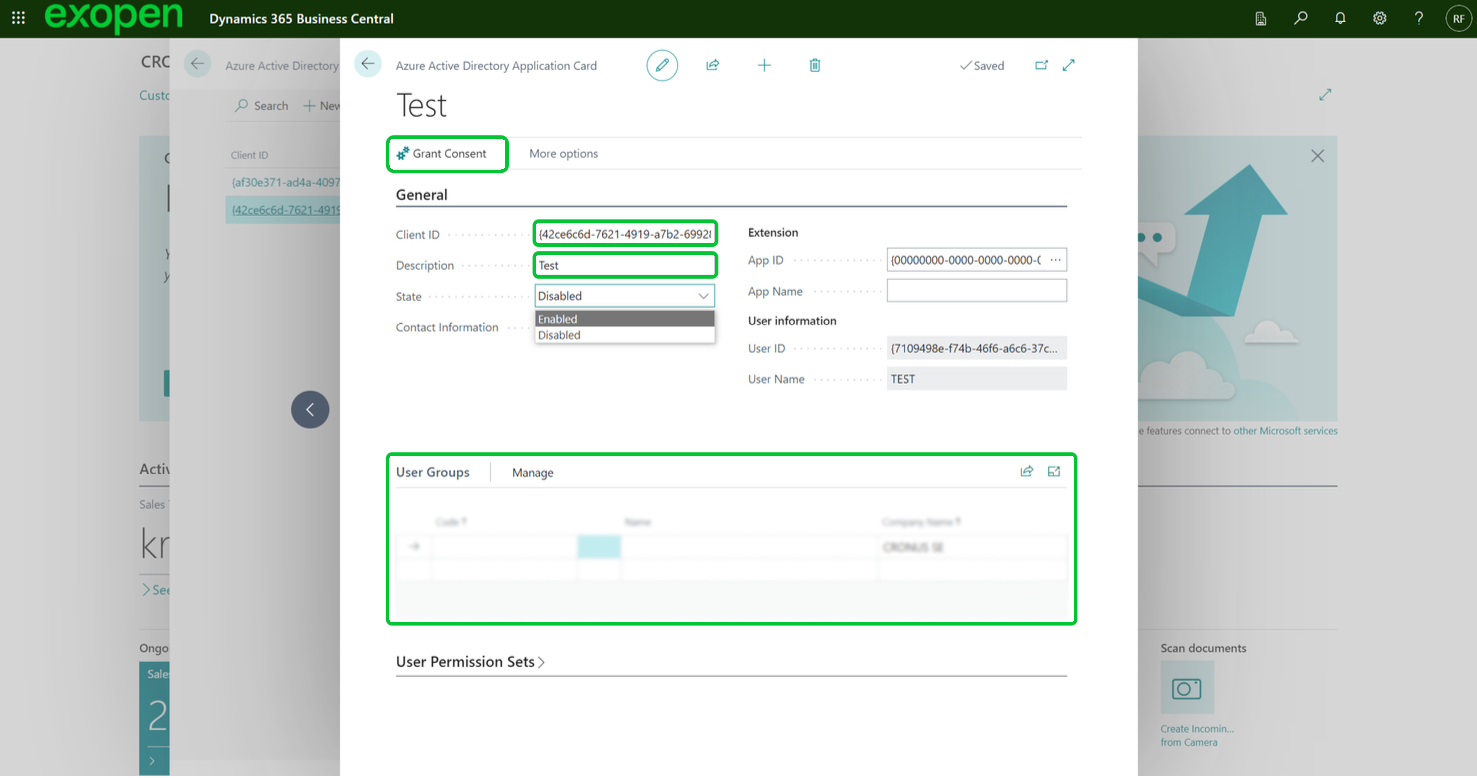
Enter the Application (client) ID and a description.
-
Assign the necessary permissions.
-
Click Grant Consent.
🛡️ This must be done by a user with one of the following roles:
- Global Administrator
- Application Administrator
- Cloud Application Administrator
Step 6: Final Steps
Send the following information to support@exopen.se:
- Tenant ID
- Client ID
- Client Secret